LiPeony Shop

Wednesday, September 30, 2009

How To Make Simple Pin Tag

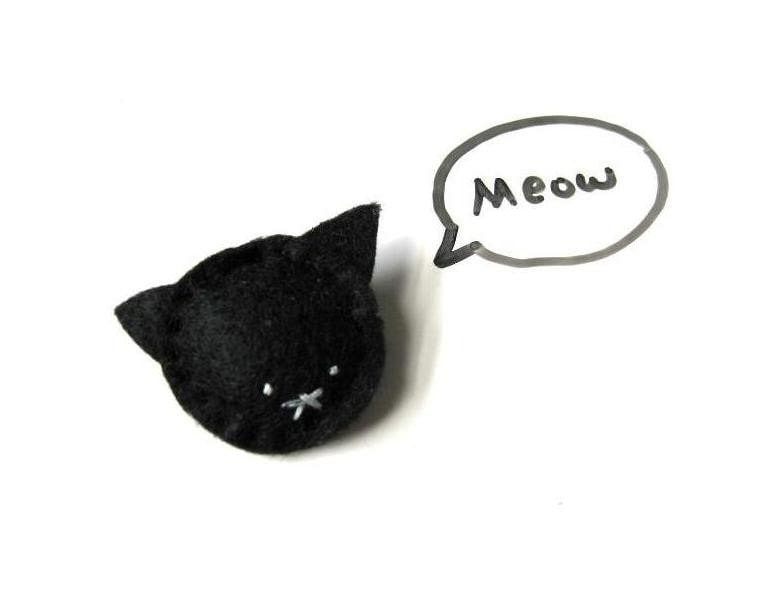
It's two days before my first craft fair at All Angel's Church this Saturday October 3rd. If you're in the neighborhood stop on by it's close to the Museum of Natural History! So... I've had heck of a time on displaying and tagging my items. I came up with a very very simple way to make tags for my little pins like the one above. All you need is:

  1. Your Business Card (1 side is blank)
  2. Tape
  3. Pin/Item
  4. Stamp Pad ($5 @ Staples)
  5. Alphabet Stamps ($5 @ A.C. Moore with 40% coupon) (Mine were small so I labeled one side and put them inside a long box to easier pick them out)

Pull out a small piece of tape and put it underneath the pin with the sticky side facing you and not sticking to the item.

Next hover it over the card until you find a place you want it and press it down firmly on the blank side of the business card. The tape should stick the pin to the paper.

Next up I combined the letters to form the words I wanted and used a rubber band to fasten them together and pressed it on then situated it on the card. Since the set I brought only had 1 of each letter I had to get a bit creative with making sure I only used each letter once in a word.

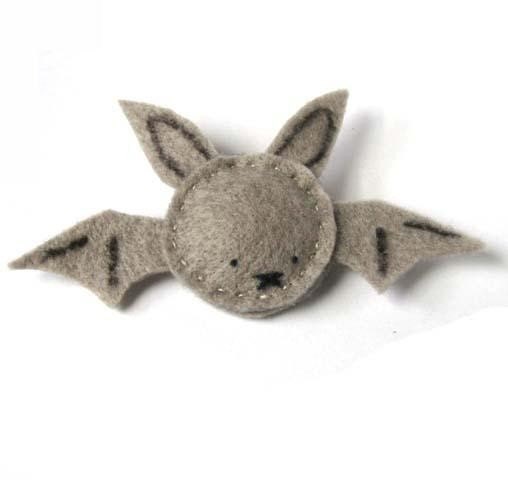
Wa-la! I added some tiny bats and it's a simple tag for my bat pin. Also because it wasn't wide enough I planned for the word "pin" to fall off the side. You could easily have put it across the long way. The good thing is that it's fairly simple and the materials are cheap and easy to get. Another good thing is that it's also your business card so if you forget to put it in or w/e or when the person takes it out they can see where they got it from. This is great for little items like magnets, earrings, rings, pins etc. Get creative with it. Hope this helps.

Until next time... wish me luck at the craft fair!

Tuesday, September 29, 2009

Busy Busy Week

SO I was on ye olde twitter when I found out the NewNewTeam Twitter found that I've been featured in Super Cute Kawaii blog! They have and showcase the cutest things especially kawaii which is Japanese for "cute". So I'm extremely happy with that! SO I'm extremely happy about that =). I think you can submit your shop and items to be blogged for free here in : Submissions. If you think your items fit that genre I suggest you try. If you love to look at awesome kawaii items I suggest you visit their blog.I'm still getting things together for my first craft show of the season. The above is the flyer by them. If you're in the neighborhood, drop on by! I also have my first midterm this Thursday so... sigh... when it rains. It pours! I'm spending all day tomorrow studying like crazy =D

Until next time... bundle up for Fall =)

Saturday, September 26, 2009

What I'm Up to =D

"Sugar Maple Seed Felt Pin" @ LiPeony
With school well along it's way it's been very busy here in the LiPeony studios. Currently I'm making painted silhouettes on felt with use of stencils and touch ups by hand. I really love how they came out. The one above is from the Sugar maple Tree seed that's the state tree of New York. I'm not one for super bright colors but I think this gives a very vibrant fall feel to any clothing especially in the Fall when people have start bundling up and I see a lot of dark colored clothing like browns and blacks and navy blues come out. This would just give that extra punch of color without going crazy.

My new fondness for making little felt pins came from this adorable little girl below!

"Mei Mei and Red Panda Pin"@ LiPeony

Meet Mei Mei a 10 week old Red Panda that resides in the Cleveland Metroparks Zoo. One of the wonderful caretakers saw my little red panda pin on Etsy and brought it. Soon after she requested three more for her coworkers. I was beyond thrilled with being a tiny part of the great work the zoo caretakers do in teaching and protecting the animals that populate this beautiful world of ours. I was sent and given permission to showcase this insider glimpse on little Mei Mei next to my pin on the left worn by a caretaker. I wish I could visit but Cleveland is far from old NYC =/ .

I have a lot of new designs that I'm going to premier at All Angels Church Block Part Craft Show on October 3rd. If you're in the area stop by =D.

One of my greatest supporters is Cuong who's an aspiring writer and journalist. As per his request I created a custom art for his friend's wedding as a gift. They're both writers so Cuong threw some ideas at me like have them writing and wracking their heads on how to express their love for each other. I used that idea as the large roll of paper they're writing on that folds into a heart around them. The crumpled paper on the bottom shows the nervousness of expressing one's feelings. Their song is "I've Got the World on a String" I took one of the phrases and put them as text on the paper. I also found the piano sheets for the song and layered and faded them to make the background. I added the yellowish color to simulate the antique vintage paper look and voila. I put their names over their heads though I fazed them out here.

I really hope they like it and I wish them all the best. =)

Until next time... always create and never stop... =D

Tuesday, September 22, 2009

Hello Fall and Craft Shows!

It's officially the start of Fall and it's also my boyfriend's birthday! SO happy birthday to him! With the start of Fall it's also the early signal for the shopping season to start. I'm sure there are many crafters and artists out there all booked up for those shows and fairs. My first craft fair of the season is going to be at All Angel's Church Block Party. It's their first one and it's right by the Museum of Natural History and I'm not sure how it would turn out but the booth fee was very small. I'm also sharing it with a NewNewTeam buddy CLineCreations. She makes these wonderful Chinese calligraphy art and Chinese knots... neither of which I have patience to make ... teehee.

I didn't want to carry my huge black frame and I had new cards and notebooks I wanted to sell I decided to make this make shift sort of display. It's made out of recycled cardboard and I decorated it with wonderful origami paper and about an hour. It doesn't look all that great by itself.
But it actually works pretty well. The little shelves are fold-able so I can lay this whole thing flat. When I put my cards and note pads on it, it doesn't look too bad. (Don't mind the messy desk. I'm a slob) and since my cards are light this will be good to create height and different levels for buyers to look at. Everything else will be either flat or in boxes people can rummage though. After this there is the New New Day at Brooklyn Indie Market on November 14th which I'm also very excited about because we got such a great deal and last time I did pretty well for my first time there. That's about all the shows I will be doing this year.

Oh speaking of craft fair there is a massive source of how to's and advice out on the web. Here are some awesome links:

Super Etsy forum post of Craft Show Tips
Flickr: Visual Collection of People's Craft Show Displays
Storque Article on How to find craft shows in your Area
Another Storque Article of Craft Show Tips
Yet Another Storque Article on Holiday Craft Fairs
Indie Craft Fair Guide: Guide to your Local Craft Shows

These are some of the useful links I've found. I think I will put up the schematics of the display I made in this post later.

Until Next time... enjoy the wonderful Fall weather!

Thursday, September 17, 2009

How to Make One Simple Good Cheesecake

It's my boyfriends birthday coming up and today he's coming to pick me up so we can celebrate his birthday early. I decided to surprise him with his favorite strawberry cheesecake. If anyone knows me I am a horrible cook so I had to find a simple recipe even I can't screw up. That's when I found this simple cheesecake recipe on EasyStrawyberryRecipes.com. There is under ten ingredients and I had half of them already in my fridge. I changed the recipe somewhat so here's the recipe

Ingredients:

Crust

2 tablespoons sugar
1 1/2 cups graham cracker crumbs
4 ounces butter or margarine, melted

Filling

1 cup granulated sugar (I put in half a cup)
3 pkgs. (8 oz. each) cream cheese, softened (I put in 2 pkgs instead)
1 teaspoon vanilla extract
2 eggs
1 8-ounce carton of sour cream

Instructions:

Combine graham cracker crumbs with 2 tablespoons of sugar and the melted butter or margarine. Press into the bottom of a springform pan. Set aside. Cream the softened cream cheese with the sugar and vanilla extract. Add the eggs one at a time, beating thoroughly after each addition. Add the sour cream, which should be at room temperature. Pour into graham cracker crust. Bake for half an hour at 350 degrees F.

Turn off the oven, leaving the cheesecake inside for another half hour. Chill and refrigerate for at least 4-8 hours. Top with your favorite fruit topping, garnish with fresh strawberries or graham cracker crumbs.

Because of the time limit I brought one of those already made graham crusts but I will seriously make it next time as the store one got extremely crumbly on the edges =/ . It's pretty easy and the first photo is what came out of it. My whole family had a slice and they loved it though because of the heaviness of the cheesecake they took a small slice. I thought it was very good. It was not too sweet and not too sour and of the cheesecakes I tried from English restaurants it is considerably lighter but heavier then those of Asian variety. I forgot to buy garnish/fruit but by itself it's very good! I'd recommend you to try it out especially if it's something easy. I hope my bf will like it =D. Oh yeah another reason why I don't bake. My family does not use the oven except as a extra space to put in pots and pans. Everything pictured above I had to take out and then put it back in. That's why my sister and I rarely bake... sigh! I'll bake this cake for my friends and coworkers next week. Hope you have fun with this recipe!

Until next time... happy cooking! =)

Sunday, September 13, 2009

Mmm Anime

I've yet to see Miyazaki's latest movie Ponyo but it's already making a huge splash overseas and in the U.S. If it's anything else like his other wondrous movies (Howl's Moving Castle, Princess Mononoke, My Neighbor Totoro) it has be great. The stories told are so magical and what I love was how the animation and art though may be simple captures the tinest details that really make the movies come to life. Not relying on CGI the animation is drawn out and colored almost reminding me of a water painting. The characters in these movies are so whimsical and deep that it's hard not to love'em. These movies are great for the entire family... I've seen his movies since I was in 1st grade till now when I've graduated college they never cease to amaze me with their depth and details.

I'm a huge anime fan going to conventions and also cosplaying. As an artist I usually don't do fanart but I have made some if the characters or particular anime has really struck me. Hoping to go to the artist alley next year at Otakon I've made a few fanarts... this one below is by far my favorite.
It's the cast of characters from My Neighbor Totoro. This was the first drawing I did entirely on computer. Using my new Wacom tablet I hit the floor running as I got use to drawing onto the pad straight to the computer. It's much harder then one could imagine. I did several drafts against several backgrounds until I got what you see above. I'm sure to revise it as it gets close to the convention. I hope you guys like it... and really check out those movies. =)

Until next time... get inspired and inspire others. =)

Wednesday, September 9, 2009

Thank You for Being Friend

When I was younger I use to watch Golden Girls and even though I didn't really understand all of it (I was like 9 at the time or something) I did understand the close knit friendship all these women had. Plus the song was catchy. I created a new card above all about being a friend. Whether it's to say "hey thanks for being there for my crazy butt throughout the years" or "I'd think we'd be awesome buddies." I do cherish the friends that have been with me and deal with my crazy antics. Which brings me back to the fundraiser my sister did for The New York Asian Woman's Center, a place of refuge and help for battered women. To say the least, it was a fantastic outcome. They initially had about little below 100 people but it became 150 guests in total. The raffle and silent auction raised a good amount that will be donated to helping battered women. Though my sister would not tell me the final numbers.. arg you! lolol. Anyways I got a nifty planner and brochure from my sister the silent auction and raffle coordinator. This fundraiser was to celebrate the opening of Peace House an emergency shelter for families and also to raise money to create more such places and programs. I found that the program was not only in English but in other languages like Mandarin, Hindi, Korean etc. One of the biggest obstacle in helping is the language barrier which is especially true in hospitals.

I volunteered in a hospital situated in a heavy immigrant neighborhood and the language barrier has always been a huge problem. Sometimes a translator was not available or was with another patient. I've seen frustration on both ends with the patients and the hospital staff. That is a story for another time.

For everyone out there...
"Thank You for Being a Friend." =)

Thursday, September 3, 2009

Simple is In

After carving my little stamp (How I Made the Stamp) and making my first stamped card I realized I can make so many different scenes with this one stamp. My cards are simple with a lot of white space. Personally I like simple... I've decided to steer my shop towards that direction. The one above called "Peeps on Earth" is an example of it. It may or may not be a good move shop wise but for me it's what I want to do.

Until next time... Sometimes simple is the best.

Tuesday, September 1, 2009

You Never know Till you try!

So my significant other took a wood carving class and gave me his carving kit as he will never use it again. That was months and months ago. After putting it off for a long while I finally used them! I made my first rubber stamp of a little robot alien head and body with antennas. I went to experiment with them and made the above little card and I love it =D. The thing about the stamp is that I could replicate the same picture but also have the flexibility to alter it to do many things.Here's a picture of what I used. It's really not much. The 1st is just a gel ink stamp pad I got from Staples ($5). The 2nd is a 12 piece carving kit by X-Acto ($26). The 3rd is a 2" x 4" Speedy-Cut thick rubber sheet ($2). The 4th is just my design ($creativity). Though I see many people use Speedball products since they seem to specialize in printing technology.

Then I found youtube videos on how to make one. Though there are more videos about how to make stamps using other technology like photoshop, cricut etc but I really wanted to actually carve my own. I stumbled onto this video made a fellow etsian UniquelyFun and here's the link to the video. The video and instructions are very clear and simple to follow. Here's the final product that I used to make the above card. I might carve out some more later but it requires a lot of patience because one wrong move and you nicked the picture. Also making the details requires you to be steady. It took me about an hour and a half to get be happy with the stamped outline I got.

Until next time.. happy stamping! =D