LiPeony Shop

Wednesday, March 31, 2010

Lil Sewing, cosplay, random Fun =D

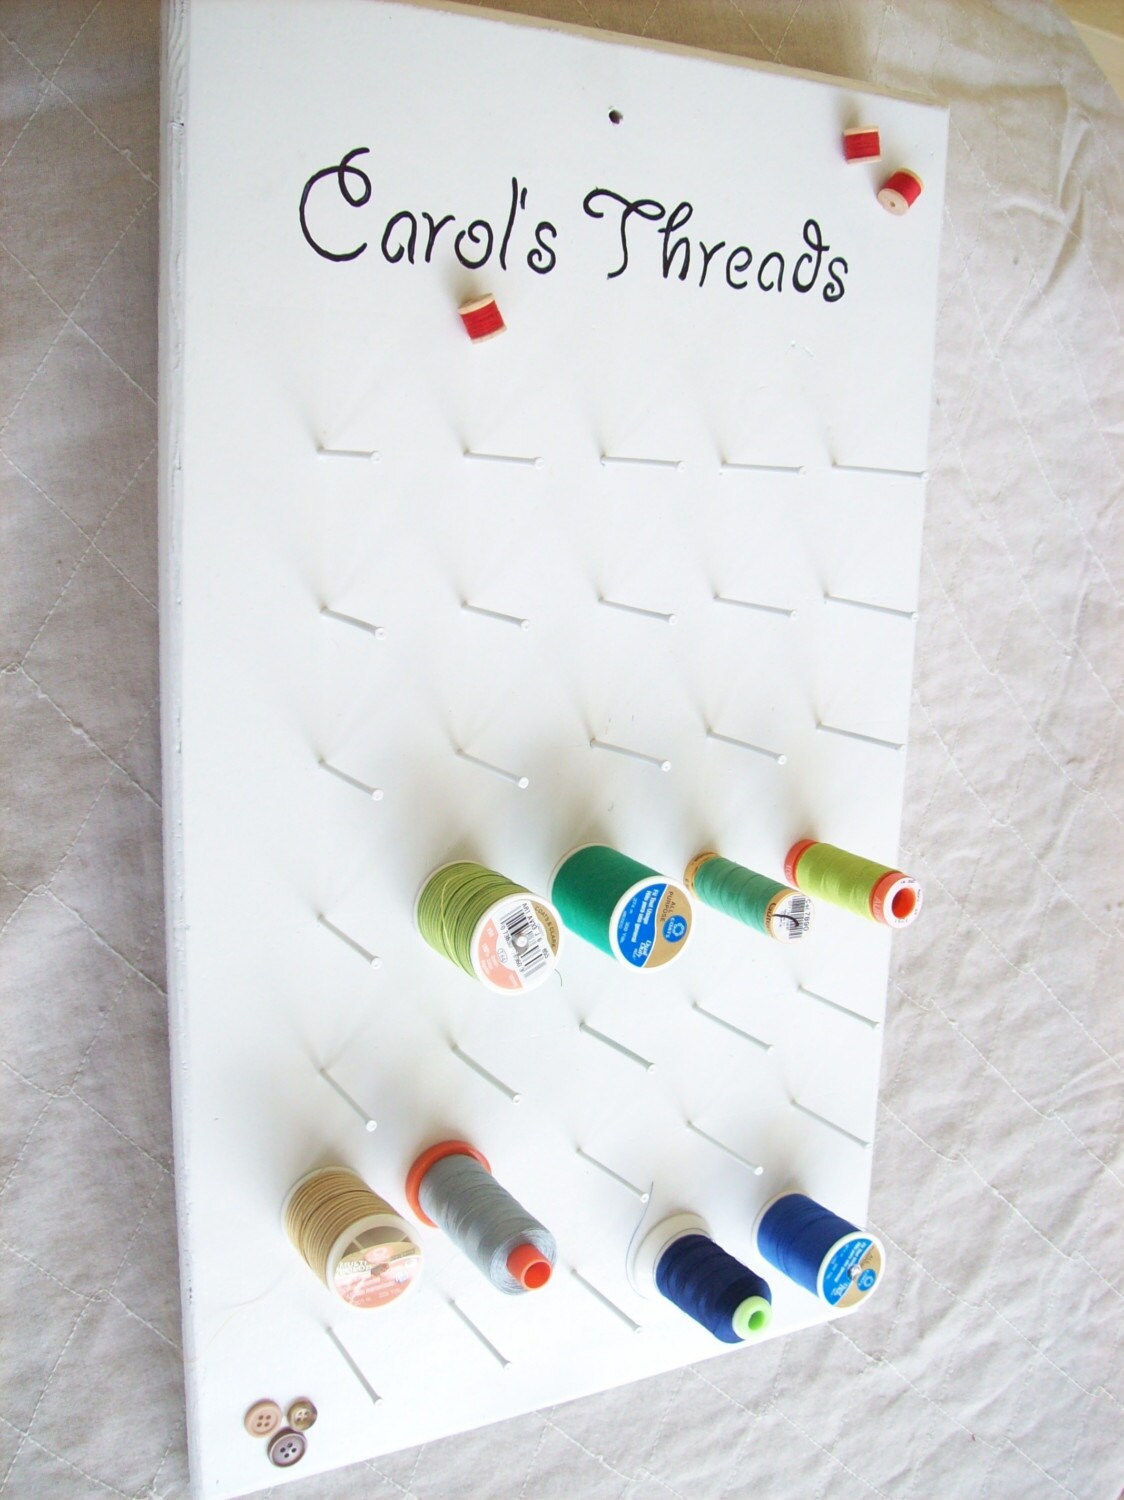
I just finished this little sketch yesterday and it's up in LiPeony. One thing I loved as a kid was watching my mom use her big old sewing machine. It's still there now. She had bags of little doodads, spools of threads in many colors and several pin cushions with the various needles in it. As a awesome reminder of those days I thought up of this little print. I've also picked up some favorites on Etsy that remind of my childhood memories by the sewing machine.

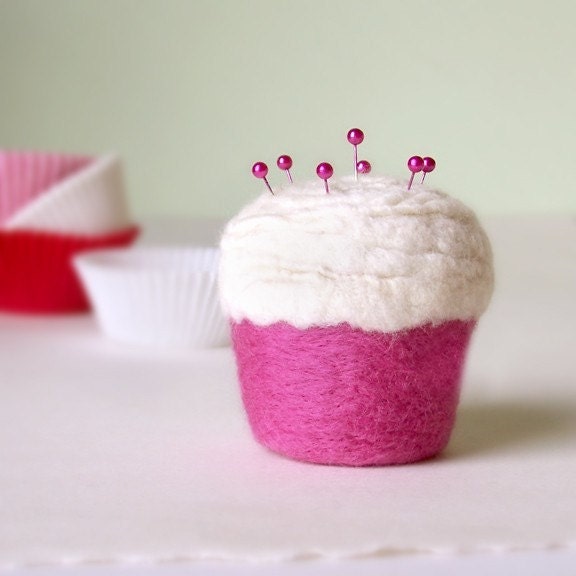
Like this adorable felted cupcake pin cushion from madeinlowell shop. It's perfect to put by the sewing machine or when you're hand sewing to keep your needles safe and in sight =D.


For people who tend to lose/misplace or just plain forget where things are this awesome roman numeral watch pin cushion would be super to have. I love the way it looks and it's so uber functional. This lil guy is from LittleClouds =D.


If you're like me or my mom we have spools and spools of thread everywhere and what better way to keep them organized then with this simple personalized thread organizer from MoreThanTuesday. You can also put in ribbons or hang bags that hold your scissors and what not too on the bottom.


For the sewer on the go or well you never know when there's a hole in your clothes or need a quick fix I found this super cute sewing kit from Chennapenna. I've never seen a sewing kit so cute before as the ones I have are pretty plain.


And speaking of sewing I've decided to cosplay (dress up) as the anime character above called Panda Z for Otakon in Baltimore. I've been drawing up the plans on making the body since I have the panda head good to go. Suppose it will be black and white felt with some type of stuffing on the stomach to make that rounded shape. I'll keep yas informed on the progress.

Until next time enjoy the weather =D

Monday, March 29, 2010

Random Goodies =D

Howdy! I just got back from a great wedding up in Boston and relatives from as far as Canada and Seattle came to celebrate! The food was great and we danced the night away. One thing I love about weddings are the little favors and favors boxes etc. Like this one below:
The top is small flower that is translated as "Love (marriage) reaches as far as the sky and is vast as the earth ." A very loose translation but I thought it's very cut and inside were five pieces of Dove chocolate and I can't resist chocolate =D.
I especially like this design on the side which is the Chinese character for "Double happiness" they're altered to look like a man and woman.
Oh and remember the hand carved stamp from the last post well I got these beauties from RusticRainbow as a trade. She also included as a surprise the awesome hairpin above! I adore the color and my sister said it was so cute. I can't wait to wear it when the sun comes out. What's great is it uses a clip that can fasten onto my very fine and soft hair. =D !
I also got this adorable mushroom pin! Look at all the little buttons, beading and details. Plus it sparkles. It's going on my school bag with my other pins. The little bear is one I made from LiPeony and the other buttons says "I buy handmade" and it's from the team I'm in the NewNew Team!

If you're wondering if that's me in the panda head. Yep! I'm planning on wearing a panda suit to Otakon an anime convention this August =D.

Until next time... it's the little things in life that makes one smile

Sunday, March 21, 2010

Week In Review

The weather was simply gorgeous this weekend! I had a fantastic time on Saturday selling at the Brooklyn Flea. I was there with my wonderful little sister Anita and my Cousin Victor and they spent their money on the awesome food downstairs. I again had those slamming fish tacos and Anita totally agreed with me. My tables mates were awesome Felicity from WishbyFelicity and Yaniamore. My new 4 foot table was easy to build and was really awesome. It's from ALPS Mountaineer and I highly recommend it, I got the XL one and I think this one is a new version and I got it on sale for $60 instead of $90 =D!

Here are some pictures of my setup and having multiple prints on the table though I have to find a way to have people browse them all as many though the small piles were of the same prints. I was thinking of having some books to flip but its been a bit hard finding 5 x 7 holders as most are 4 x 6 picture holders =(I do love this display unit it's actually for photos but you can obviously use the clips (which are included) to clip other things too =D I got this one from DickBlick. Afterward the super day we went out to BonChon to eat some Korean Fried Chicken. It's kind of weird since the atmosphere was a club/lounge but their main thing is fried chicken. Unfortunately we waited for 1.5 hours because the place was small and it was PACKED.

BUT the chicken was really good. What makes Korean Fried Chicken different is that it's double fried and apparently less oil then the fried chicken we're use to. I'm not good at eating spicy stuff the ones we got was soy garlic fried chicken. It was extremely good but definitely not worth 1.5 hours wait. Half an hour to 45 minutes seems fine to me. You can make reservations until 6pm I think. The service isn't exactly top notch but they do make some great chicken and they also have a bar. Here are some reviews of the particular BonChon near the Empire State Building, we went to: BonChon Reviews. While on twitter RusticRainbow who makes the cutest felt items asked if I could make a custom stamp. It's my first time ever and I think they turned out great! I tried to make it look similar to the font of the shop and it did take me a while as I wanted to be as careful as I can. I'll be making one that says "Please Do Not Bend" for my prints when I mail them =D. That's my week in review =D

Until next time... hope everyone is having a great day =D


Tuesday, March 16, 2010

Goodies from China =D


After a long two month trip to China my bf came back but not empty handed! He got me these beautiful cheongsam ( qipio or mandarin dress) and they actually fit very very well. I'm naturally very slender and short to boot but these were perfect and I love the intricate beading and designs onto the fabric. Everyone liked the brown one the best though upon first seeing it you'd think it looks rather drab or old style but it was actually a very demure modern brown with flowers.
For some reason I am a huge fan of airline peanuts. I don't know why but ever since I was young my grandparents would travel back and forth and bring back a couple of these little snacks. He got some and also this odd rice cake thing he got from Korean Airlines but I've yet to eat it. The last couple of things are dried food. One is dried bamboo shoots which are apparently insanely expensive in the US and extremely hard to find. My mom loved them and when they're soaked in water returns back to this soft rubbery consistency and has this slightly sour taste to it. My bf's family hails from Yunnan which is famous for it's tea and he brought back some family grown and dried tea above. I didn't try it yet but my mom is also gaga for this too. It has a slight sweet taste and she's been brewing a cup every morning.

Alas no cute stuff to be had but the places he traveled to were very rural and I'd hope to post of the pictures of the areas he's been. Currently I'm in full study mode for the stack of midterms next week. I'm also preparing for a craft show this Saturday at Brooklyn Flea. So if you're around just stop by... and gotta try the food... it's so awesome XD

Until next time how's you guys been doing? =D

Saturday, March 6, 2010

How I Make Stamps =)

Howdy everyone! I hope everyone is having an awesome weekend. This weekend is my only time to relax at home since all my other weekends this month and next month will be out of state, craft fair or out running wedding errands for my roomie =) . I've always mean to show people how I carve these stamps. To be warned this one is intermediate level stamp but the same concepts and techniques are applied to simple and more complicated ones.

First of all got to have the tools. I have two types one is the X-Acto kit which belonged to my bf. Though its actually for woodworking I find that it works beautifully with making rubber stamps. For the tiny tiny details I use Speedball tools. Third is Speedball rubber. You don't have to use the same ones I do but I find I like the tools and medium I use.
One great thing about the Speedball kit is that all the cutters can be stored in the screw top bottom. This one is actually a lino cutter but I've yet to move to carving on linoleum.
Have a design ready drawn out in pencil. Retrace the lines strongly in pencil because that will help in transferring the image to the rubber surface. The above one is one I've drew about a month ago. I know it's so very Alice in Wonderland =D When you make a design you should think of how detailed you want it to be. The more details and tiny details the more time you will have to devote to it. Also you have to decide which part of the design will be inked and which part would not be inked.
For this bunny design I've decided to have the background of the bunnies inked while the bunnies themselves will remain un-inked and show the color of the paper/medium I am stamping on.
Now cut the appropriate size of the rubber sheet to fit the stamp. Mine is 4" x 6" image so I cut one that's about 4.5" x 6.5" big.
Now position the drawing over the sheet of rubber.
Then use a pencil to scribble all over the back of the design. Do multiple criss crosses to insure that the pencil drawing is transferred onto the rubber. You can lift a part of it up to make sure you got all the black lines.
You should see the image onto the rubber like above. You can trace it with permanent marker like a Sharpie or with pencil again to define the lines.
Now here comes the carving. I use the largest cutter size to cut the big areas out without going too close to the edge. Once that's done I use a smaller size cutter to make more careful outlines of the image. I tend to carve like how I peel an apple... with my left hand guiding my right hand. Though everyone does it differently one thing is you must be very careful as these tools are very sharp and you can accidentally nick your stamp or yourself. So slow and steady does it.
There are varying sizes of cutters I rotate from the biggest, medium size to a very tiny one. Unfortunately I have no good stamping ink though I'm planning on getting Versa or Staz-On ink as I heart great reviews about them and the potent color.
Instead I'm using Speedball block printing ink and a brayer. Stamping and block printing are actually very similar.
I only have red, blue, yellow, white and gold so I mixed the red with white to get a nice pink color. =D. I use a thin plastic sheet protector to spread my ink one. I used a toothpick to mix the ink.
I mixed the ink and spread it with the brayer to get an even coating. Now I run it across the stamp until the whole thing is evenly inked. Now I pressed my paper on it which happens to be a 5 x 7 blank card and smooth it out firmly but gently. Then I peel off the card.
Ta-da! You get some lovely images on cards. What I love about using block printing ink and a brayer is the way the color comes off on the surface. It gives this faded fabric look. Everyone one that's printed is different. I really loved how these came out. I think I'll be giving out a few of these. I even have the deer one framed on my desk. =)

I'm still a novice in carving and stamping and block printing. I hope this tutorial help you. There are a lot of tutorials and tips out in the Internet so search away or you can shoot a question here and I'll try my best to answer it =D

Until next time! Ta-Ta!

Tuesday, March 2, 2010

How to Make a Peekaboo Bunny Card

Happy March everyone! We're getting closer to Spring and hopefully nice warm weather here in New York City! Anyways today while looking at all my art and craft tools and wishing I had more (really want some new ink like Staz-On or Versacraft etc) I fiddled with what I have and made some neat little cards. When it's closed it looks like that above.

But when you open it... sha-zam! Bunnies! It's very simple to make this Peekaboo Bunny Card.All you need is a blank card 5 x 7 or 4 x 6 any size is fine and dandy. Some stamps like the ones I carved above and a large hole puncher. The one I used is 1.25 inches that makes large circles. What's great is that these paper punchers come in tons of sizes and shapes. Imagine peekaboo bunnies coming from heart shaped openings that would be super cute!
So all you need is to plan where you want to position them. Note is that the punches limits me to punching holes close to the edges. You can punch the holes out first then stamp the bunnies on the inside page or vice versa. Then you can decorate the punched holes. Depending on the hole size and stamp size the whole stamp can show though but I think it's cuter to just show the bunny ears. You can do so much with them from different punch shapes/sizes to the stamp size and animal or object. Very easy to do and the possibilities are endless!

Currently I have many tons of bunny art and cards like above all made that I'll be introducing into my shop though I have to get my rusty camera skills up. I'm also going to be at Brooklyn Flea. The experience and food was so great the first time I'm going to be there again on Saturday March 20th. So if you're in the neighborhood just stop on by... grab a fish taco or cupcake and browse around =D

Until next time wishing for warm weather =D