LiPeony Shop

Tuesday, November 25, 2008

Oh Rainy Day

Oh yes yes, it's a cloudy rainy day in NYC. The roads are slick and those small puddles are forming next to the sidewalks. The one good thing about the rain is that now it's much warmer then the frigid temperatures from before. Then again if it was colder then the rain would become snow which is a great alternative to rain! I made the above little origami doll to express that dreariness that I sometimes associate with rain. I love rain when I don't need to go anywhere and it makes sleeping in so much better.

Rain Rain Go Away...
come again when I don't need to go out and I can sleep late ... day...

Until next time... wish you all sunshine and lollipops =D

Monday, November 24, 2008

Mess... Destress

Is that like your room? Like what my chemistry teacher said everything in the word is always heading towards chaos. Well I'm a sporadic cleaner: my room gets messy and suddenly I go into a frenzy cleaning for hours then stop and my room goes back to being messy again. Now that I've started crafting a lot more I have stuff everywhere and my room is very very tiny. One day a stroke of genius hit me square between the eyes and I drew up the plans and my Dad helped me make this thing below:

No it's not one of those medieval torture devices though I suppose it can be used that way. It's my new rack for my origami. It can be used to hang so many different things and it took about half an hour to make. All you need is a good piece of wood, doesn't have to be super thick, maybe 1/4 of an inch thick and a whole bunch of straight thin nails. Now just space out where you want the nails to be and start hammering away. Also hit the nail so it bends up a bit so if you hang something it won't slide off. Either drill two holes on the top or have a looped screw to hang where ever you want. So I hung all my finished origami and it frees up tons of space on my desk for me to craft more and its great to organize your stuff. The beauty of this is that it lies fairly flat depending on how the thick the wood is and how far you hammer the nails in. The one above is hanging on the back of my door. Another great thing is that it's completely customizable. You can choose the size of the wood, the spaces between the nails. Heck you can make it like a long rectangle with thicker nails or wooden pegs to make a darn coat rack.I was looking though the web and found this nifty tutorial from about.com on how to make your own pretty boxes out of shoe boxes and whatnot. The instructions are very simple and you can easily transport your stuff from home to craft fairs or whatever and use it as a display because it's so darn pretty.I really love these foldable boxes from Ikea. I love the simple designs and the fact that they are mesh like and come in a variety of sizes. It's about 8 dollars for 3 boxes. I'm a very big fan of any storage boxes or bags that are foldable so it saves a lot of space when you don't need to use them right away. There are tons of such items on Etsy and on the web or your local store. You can always find them on sale ever so often, so check it out. I know the extra bed drawers underneath my bed are a life saver I put all my heavy sweaters and hoodies there. Whenever it gets chilly it's right there and ready to be taken out and worn.

Until next time... don't get stressed over that mess =D

Saturday, November 22, 2008

My First Ever Try On Cooking

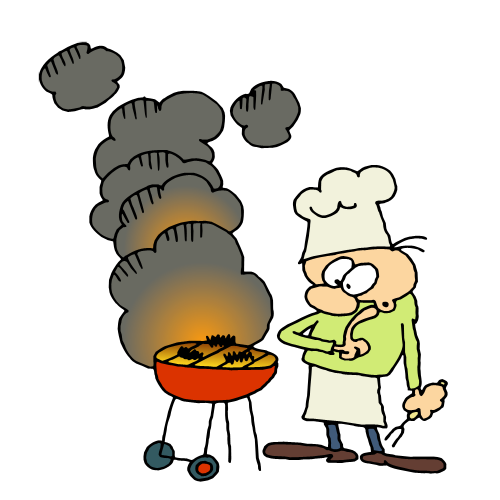
Yep... when it comes to cooking that's basically me up there. The only thing I can cook is Ramen and anything with boiling water. I had many cooking ventures in college where I dormed and lets just say my friends gave up on me. In the course of those four years I managed to start three fires, two in the oven and one inn the microwave. Plenty of things burned beyond recognition. Unfortunately my artistic creativity doesn't help in the kitchen as I always love mixing this with that and not following recipes. I once again dare to try to cook, and well this is what happened!

The original recipe is Grilled Chicken with Yogurt- Herb Sauce but my family doesn't like yogurt so I cut the Yogurt- Herb sauce part. Below are the ingredients I used for it.
Sprinkle generous helping of salt and pepper on the chicken. As I didn't know it's best to slice the chicken fairly thin because it makes cooking a heck of a lot easier. I used two large chicken breasts that I cut into thin strips about half an inch thick give or take. I diced the leaves (make sure you wash them first) and mixed them with the diced garlic, honey, cayenne pepper and olive oil. I just mixed them as well as a I could. The actual recipe asked to puree it in a blender which unfortunately I had no idea where it is. I marinated the chicken in the mixture and put plastic wrap and put it in the fridge. You're suppose to marinate it for no more then 24 hours but me being extremely hungry after going shopping and just finding the kitchenware decided to whip one up.


Here is the chicken in the mixture. I'm not a big fan of overpowering basil flavor but this had a slight fresh aroma which surprised me since when I was chopping the basil it made my fingers smell all funky and basil-ly. Oh at least something came from me watching all those cooking shows. If you stack teh basil leaves and roll them together. You can slice it and it makes it much easier.
Here's another thing I had to improvise. I had no clue where the frying pan or grill was so what did I do? I used a wok. If you don't know what it is. It's a Chinese type kitchenware used to stir fry stuff. I set the heat on low and dipped one of them in and man did it sizzle! I love the sound of sizzling... don't ask me why. I cooked it around 3 minutes each side or until it was tender. I was paranoid and even cut them in the thickest part to make sure it is fully cooked. Even though i don't like overcooking things I rather not take my chances with getting some kind of bacteria that would wreak havoc on my digestive system. Here are the results!
Nice and golden brown and all those little things on it were the pepper and leaves. I ate some very cautiously though I've never had problem with food no matter how bad. My friends say I have an iron stomach. You know what it actually tasted good! It was moist and even though it was browned it didn't have that brunt taste! The pepper and cayenne peeper give it a extra punch making it a bit spicy but not overpowering. The basil and the parsley blended to make the whole thing taste very fresh with hints of both, again not overpowering. I cooked the rest for my family and they were pleasantly surprised too! Not to toot my own horn by my dad and sister are harsh critic and won't hesitate to tell me that my cooking stinks. The most surprising thing to them was the flavor. Since in my home 99% of everything we cook is Asian cuisine and normally we don't use basil or really even black or cayenne pepper. My mom commented that she loved the unique flavor and asked me to make more. I said... next time.. surely I will try more stuff.While pouring the extra virgin olive oil or (EVOO) I recalled listening to those cooking shows and health shows about which oil is best for your health. We don't want to clog our arteries with fat and cholesterol and what not. So I went around snooping for the answer. Here's one take on which is best.

Making Oil Choice: Top 3 Picks

If you have room in your pantry and a wallet for only 3 oils, this trio offers health and versatility.

Extra-virgin olive

This flavorful, heart-healthy oil is unrefined thus high in antioxidants and polyphenols that are a tonic to cardiovascular health. Less expensive, but so-called "pure" olive oil (not extra-virgin) is refined and more tolerant to heat but also less nutrient-dense. Don't bother with "light" olive oil; it has virtually no character and even fewer polyphenols. Use extra-virgin in low-heat cooking, baking and dressings.

Canola

High in omega-3s, this practical bland oil with a relatively high smoke point can be used for sautéing and baking. Most canola oil is highly refined to extract as much oil as possible from the seed. The resulting inexpensive version has a long shelf life. Some consumers choose to pay more for less refined organic canola oil. The organic designation guarantees that the seed was not from genetically modified plants.

Walnut

This specialty oil sports a higher price tag, but along with its rich, nutty flavor comes omega-3s and vitamin E. Close runners-up in this category include toasted sesame, pumpkin seed and almond oils. We chose walnut as a top pick for its relatively long shelf life: 3 months when refrigerated. Use it to dress salads, especially those containing flavorful cheese and nuts.

I got this from Eatingwell.com. There's loads of places to find out more information I'm only citing one source.

BTW I give major major props and kudos for all the people that cook!

Until my next cooking adventure... good day and eat well!
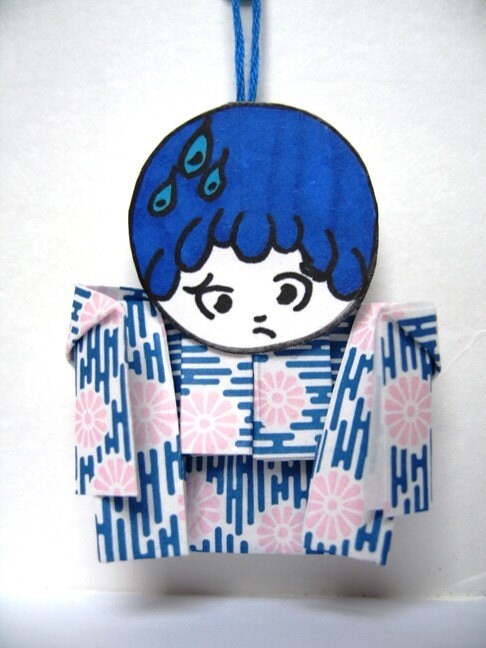

Wednesday, November 19, 2008

Flying High and Rolling Waves


Is that bizarre looking or what? That's a picture I took of the helicopter leaving the landing pad a few summers ago. Even I'm a city girl though and though, I have spent many summers in Atlantic City, New Jersey.
Even though it's technically a city it had a very different view. If people don't know it's basically the Las Vegas of the East Coast. I've been to Las Vegas and A.C as people call it here pales in comparison. Anyways during the summers people come from miles and miles and miles away to enjoy the sand, surf and gambling. Above is a map with all the casinos and trust me it is a long long walk from one end to the other end. My aunt who lives there claims Bally's machines are better... but I don't know I've never gambled more then a dollar. I'm a chicken so sue me. =P


There use to be a mini theme park called Steele Pier in front of the Taj Mahal ( a sight to see all in itself!). As far as I know it's going to be closing soon for good. One of the coolest rides they have there is the helicopter ride that takes you all around the townships in the area or up and down the shoreline. It's a pretty penny but it's worth it. Since I worked there one summer which I tell you is one of the most oddest summer in my life and really tried my nerves because frankly when people go on vacation so do their brains and manners. I would recount the many many problems but nah... anyways I got me and my friends a free ride at the helicopter.

I tell you it's very very unnerving. The sound of the blades is deafening and your heart and stomach jumps when the helicopter lifts off. It's almost like being strapped to a bumble bee buzzing up and down the coast! It was fantastic! We got to see the never ending Atlantic Ocean and the lights of the many casinos. It was almost surreal. My friends were shaken up but when we got off and I thanked my awesome coworkers and we couldn't stop talking about how it felt. It really is MUCH MUCH different then a plane! It was like a plane on caffeine. Here's a picture my best buddy Cuong took and sent to me. He's a whiz with the camera and with words too... he's a journalism major. The beach is nice though I suggest if you are there to go to Ocean City which is a short trip away where the beach sand is much cleaner also an added bonus they have tons of craft fairs. I always seem to miss them when I go down to enjoy the unique environment. Another note is that during the summer nights its absolutely gorgeous and there are free bands playing all though the night like the Beach Boys for instance. I'm sure. I'll save more about my adventures in Atlantic City for another time.

BTW New York City also offers helicopter rides brought to you by New York Helicopter Charters. I've never been on one but I've seen where their landing pad is. To get wonderful views of the city I suggest going to the Empire State Building or even better take the BQE (Brooklyn Queens Expressway) or just ride into the city on a bridge or even from New Jersey and you are treated to a full blown view (on a clear day) of the Manhattan Island. Look at it at night for a very dramatic effect!

Until next time... don't bet more then you can lose =P

Tuesday, November 18, 2008

I'm a Nerd and I'm darn proud!


Yes since I got my glasses I've looked like the typical "nerd" but I'm no way ashamed of it. To celebrate that I created the "I'm not a Nerd" little guy above! I really enjoyed making his swirly eyes and the book. The book actually has little squiggles on the inside so it looks like it's an actual book! I'm going to make a girl one but since my sister took the camera to school (Cries big tears) I won't be able to get any new pics up! I have items ready to post so no worries! Alright this is dedicated to chic geek finds on etsy. The best way to search was not really using the word "geek, nerd etc" but more so a combo of that and something else more specific. Here's a taste of some of the ones I love.

Okay every person needs something warm to drink to get those brain muscles awake, be it tea, coffee or some nutritious concoction created solely to giving your brains a good shake awake. The ones above are these awesome chic cups and platters with nerd and dork on them. They look so stylish and perfect for those morning beverages and rise and shine kicker. These are brought to you by trixiedelicious. Remember these? These wonderful floppy disks? I grew up in the age of computers and I went from the original bendable floppy discs to those cds we use now. Heavensentcrafts brings back the wonderful usefulness of these floppy disks as notepads! Isn't that awesome? They're actual notebooks with covers of real floppy disks and great to write on since floppy discs are pretty hard and sturdy.

When i saw scientificculture in a virtual lab on etsy I fell in love with the whole store. Not only does it have little Issac Newton and Einstein finger puppets they have these cute little bacteria plushies! I know we don't like E. coli in our food but come on that plushie is so adorable! I'm a big fan because well I love studying microbiology so I was floored by the wonderful bacteria and they look so innocent don't they?

There are so many fantastic little finds for everyone that you are bound to find something you'll fall in love with! I'm already browsing and getting ready to let loose with my mouse.

BTW for those in the New York City there is going to be a craft fair called the Handmade Cavalcade where some of the New New York etsy team will be selling their wares. I'm going to check it out too =D. Click the link for more info!

This is Meek wishing you a super duper day!

Monday, November 17, 2008

Where art thou snow?


It's only Mid- November but I am ready for a bit of snow. Around New York City snow usually does come till after Christmas. Well there goes the White Christmas I hope every year! I know with snow comes delays, traffic, cold and a host of other unpleasant things. I love snow nevertheless. Snow got me thinking... you know when they say no two snowflake are alike due to all these bazillion things going on in the sky well people are very much like that. I used that idea to make the Snowflake Folks above and they're up in my store now. Another of my favorite items is this one called a Winter's Night. It's an ACEO (art, card, edition or original) you can find a post dedicated to ACEOs in my little blog. This one didn't seem to stand out when I first drew it on black and white. But after putting the color in, I really love it. In fact I brought a whole package of limited Sharpie colors and who knew they came in so many! Right now it's pretty cold in the city and I'm snug in my froggy pjs posting and watching the morning news and that's after I bring my brother to school. It's a quiet morning which I cherish in this lovely busy city of mine...

Silence and Calm...
wish you all a great start to your week!

Saturday, November 15, 2008

Dear Dumplings


Mmm... lunch... Yesterday night I happen to spot a thread on forums about Chinese food. Rave reviews about the usual lo mein and fried rice and dim sum along with cracking those fortune cookies and what not. Well I wanted people to know and I'm sure many do that there are tons of all these fantastic different types of Chinese food. Living in New York City has definitely offered me and many people a taste of various types of culture around the world. One of the best places to find inexpensive cuisine is between Aster Place, St. Mark's Place, SoHo, all the way to Little Italy and Chinatown. I recommend you to not stay on the beaten path and to explore the quiet neighborhoods. Trust me it won't disappoint you. There are numerous little treasures of cute out door restaurants, jazzy comfy places. There is simply not enough time for me to explain all those tiny hidden treasures. There are plenty of blogs and info about it.

BTW an awesome site that I usually go look for new places is Menupages. A site dedicated to reviews of hundreds of restaurants in NYC. Everyone uses the Zagat which personally I don't read because usually from my experience once restaurants get into the Zagat all of a sudden their prices skyrocket. Not cool. Granted many of those restaurants are awesome but sometimes a girl wants a cheap good meal.

Like any other country/nation food differs from area to area and today my mom decided to buy Shanghai Dumplings other know as xiaolongbao or little dragon buns. These tender dumplings are usually filled with pork or crab or a combination meat inside swimming in a soup like sauce. Now these are served steaming hot in a bamboo type steamer and usually in groups of 6-9.

Okay these are the tools needed to eat these so called "properly" which are chopsticks, soup spoon. The large ones that curve at the handle. Oh and also they usually have black vinegar with a bit of ginger. Personally I don't use it but my family LOVES it, oh and it has a very pungent smell too.Okay you know those wooden chopsticks they give you sometimes? Well Supposedly if you happen to break them so they're even it's some type of good luck or something. As you can see above I don't exactly have that luck today. lolol.

Okay first off these buns taper on the top use your chopsticks (there are many ways to hold one) to only grasp the top like above and once there's a successful liftoff just quickly slide the soup spoon underneath to support it. Now rotate it so one side is up and nibble a small piece. Wait for it to cool a bit and drink some of the soup.

Now enjoy the rest of meal! Now people have always wondered how do they put the soap inside the sealed dumpling? Well they freeze large drops of the soap and put it inside with the uncooked meat and seal it off. So when it steams the soap melts and the meat cooks. It's basically a little steamer inside the dumpling. The magic is all in the soap base it gives the meat the flavor and it's a well kept secret. Here are some of my favorite dumpling places.

Shanghai Cafe
100 Mott St, New York 10013
Btwn Canal & Hester St
Phone: 212-966-3988

( The crab and pork one is simply scrumptious and try their rice cakes which are like large slivers of noodles fried with assorted meats ) Oh yeah they don't accept credit card so be prepared with cash... their items aren't very expensive though.

Joe's Shanghai
9 Pell St, New York 10013
Btwn Doyers St & Bowery

Phone: 212-233-8888
(This is probably the most well known place for Shanghai dumplings and everyone knows it's not their dozens of waiters that want you to hurry up your meal to serve the next customer, its the dumplings. Their dumpling soup is simply fantastic! I really love the homey and strong flavor yet the meat is tender. There's usually a line that starts around 7:30 or 8pm so be early or be prepared to wait.)

There's also a similar dumpling house next to Joe's Shanghai but I do not like the place just due to the service. They're very bias against women or so when I last visited. The entire time I was there the waiter did not even ask me or look at me, instead he asked my friend who was a guy what he wanted and even asked him what I wanted. Hello! I'm not invisible! I can order my own stuff all by myself!

Anyways if you visit or live in NYC I always encourage you to explore the great city! You are bound to find a diamond in the rough!

Eat hearty!

Thursday, November 13, 2008

Magnetic Personality?


Howdy from NYC! I was walking to my fridge to do my usual raiding when I saw all the little magnets my family has collected over the years. Most are the flat ones that double as business cards and what. I also have a magnetic board in my room that came with magnets that holds all my schedules and important notes. Well I made some magnets of my own which are the ones above! My Dizzy Busy Mom magnets, they have a good magnet on the back and sprayed with protective coating of acrylic. The biggest problem was finding good magnets. The ones I found were called "craft magnets" which are decent and I found them in Pearl Paint. Don't use the magnetic tape... I brought some and they don't work. I decided to do a bit of research on magnets for crafting. There are mainly three that I see... one is the craft magnets they're usually light and thin and only good for light items like paper and foam. They are the ones that usually come with self adhesive on the back (not guaranteed to work), next are ceramic magnets that are thicker and stronger versions of the craft magnets and those are the ones I use. They're also slightly heavier and you have to stick them on yourself with glue. I use Elmer's and it's held up fine on my board. The next are neodymium or (super) magnets, these are light, not that much more expensive then the other magnets requires you to stick them on and is very strong. The only ones I've used were ceramic and they hold a good 2-3 sheets of paper that's fine. I got my info from this Craft Store Online. By the way suppliers on etsy also sell these. Here are some of the great magnets I found on etsy. Above is from Mooremagnets. I see her a lot in forums and I love her magnets. She's specializes in magnetic boards that also include magnets in punchy colors and designs. What I like about the one above are that they are magnetic boxes that you can slip pencils/ pens and markers in them. Perfect to use on any magnetic board and you can always switch off the pen if you like or if it runs out of ink. Check it out!.


When I was browsing under magnets this little critter above just shot to me. It's this awesomely cute felted magnet! I love the texture, the simple designs and the colors! This is brought to you by the little new store MarcieMayFibers. I think they are just the cutest little things.
Okay I'm a little bias to origami paper and design so I really loved the ones from Gamiworks. These are chiyogami paper of tiny goldfish in clear tiles. It's like having a koi fish or goldfish pond on your fridge. What can be better then that? Plus it comes in that super convenient box!

Magnets are fun and can be dangerous if you don't use them correctly or swallow them. How can magnets be dangerous? Well for one eating one is highly NOT recommended. You laugh but there have been toy recalls because the magnets of toys came off so easily and kids ate them resulting in surgery. Here's a pretty darn important list for all you people with kiddies.

Toy safety tips for the holiday season:

For children under age eight, avoid toys that have sharp edges and points.

For children under age six, avoid sets with small magnets, which could cause serious injury or death if swallowed.

For children under age three, avoid toys with small parts, which could cause choking.

Helmets and safety gear should fit properly and be worn by children using riding toys, such as skateboards or in-line skates.

Improper use of projectile toys, such as rockets or darts, could result in serious eye injuries. The toys are for older children.

Keep toys appropriate for older children away from younger children.

Battery chargers and adapters can pose a burn hazard for children. Adults should supervise charging batteries and pay attention to warnings on the chargers.

Look to toy labels for age guidelines and safety recommendations.

Choose toys that suit the child's age, abilities and skills.

Select toys with a sturdy construction.

Discard all plastic wrap after gifts are opened.

Source: U.S. Consumer Product Safety Commission

Anyhos this post became much longer then I expected. LOLOL..
This is Meek signing off!

Tuesday, November 11, 2008

Packages! Packages!

Hello! Hello! I hope everyone loved the cupcake special! Today well actually yesterday was special day. I got my 10th sale! WOOT! Making small goals is absolutely awesome awesome! So I decided to add extra punches to the packages! Well it took me a while to figure out what to do to make it special! Oh yeah before I forget USPS has a lot of neat things to help you with packaging stuff... for example (this I learned from the etsy forums) you can arrange for them to pick up packages from your home (not sure how this works for apartment buildings but shrugs?) and they also give out free FREE FREE packaging supplies. Don't believe me? Click here at USPS. Which is pretty darn neat!
Well being the darn rebel I am I package all my things in bubble envelopes. No not the ones that you can easily pop and have that satisfying POP! POP! noise from Staples. I'm sure there are cheaper places out there but Staples is so close by and I am lazy. So whoever buys from me I check out their store and profile. Based on that I draw designs on the envelope. For this one, the person loved to travel in an RV so... yeah that's my attempt at drawing a traveling RV. It's kind of not as professional and stupendous as many I've seen before there's a whole flickr (image/blog type) network with some mind blowing packaging ideas here Packaging Flickr.

The pictures are bad because I packaged it at night after my boring night class. I wrap them in tissue paper with a band of origami paper around it. I also include my business card and this little tag since its holiday season and I didn't want to sell the tags. Thought it would be cool.

I loved the positive feedback for the cupcakes and my How - to 's so I'm planning on making more reviews and How - to 's in the near future. So keep an eye out on the left side bar under How - to's!

Until next time... thumbs up ... (-b^^)-b

Monday, November 10, 2008

CupCakes! CupCakes! Cupcakes!

Are you tired of eating processed candy bars, bags of chocolate and what not? Well I got the perfect remedy! The every tiny but mighty cupcake! I've never eaten too many cupcakes in my life but this weekend my old college roomie wanted to celebrate her birthday a bit early since we all have work and school on her birthday which is today. HAPPY BIRTHDAY MIN!!!! Well she was raving about this cupcake place in New York City in the west village. She found this cupcake place from a blog that was dedicated to cupcakes! It was a gloomy day but there was still a lot of people milling around. West Village is this pretty hip neighborhood where the buildings are old fashioned with those ye olde signs but with a modern twist. There are tons... I mean tons of tiny little bakeries, restaurants and stores. Many of them are famous little gems. I suggest if you ever go to NYC or live here go visit the area there's always something new.
The cupcake place we visited is called as their logo states "Batch - a take out bakery, dessert shop, and everything sweet by Chef Pichet Ong." Click on it for the direct link to their site. Above is the picture of the menu and really unique card they have in their quaint little shop. The shop itself is small but very welcoming. I kind of regret not having taken a picture but on the shoppe window is this very comfy white sofa with a coffee table filled with various cooking and retro magazines.
I also picked up this nifty postcard as I love post cards. Well I really love design on it but it turns out to be advertisement for this really awesome website called DailyCandy, which is this unique site that reviews new fashion, food and fun what is really cool is that it's not just a "NYC" thing they have reviews of new stuff from very popular cities like Boston and Seattle. It even goes international to include London also. I'm not very fahsiony but I really love the simple design of the website, anything that's easy to navigate and also looks nice is always a plus in my book. By the way etsy people... they also do advertisements and if this site is in tune with your shop maybe it's a great way to promote your shop.
Okay these are the four cupcakes I brought for my buddy... of course she choose them. These are actually 4 of the 5 top cupcakes in the store. We proceeded to sit in a Starbucks and slowly try them. Unfortunately sweet coffee does not go well with cupcakes so I suggest a tall glass of milk. These small cup cakes are about 2.5" x 2.5" (I'm eyeballing it)

The first one we tried was the Carrot Salted Caramel Cupcake. I'm not a big fan of carrot cake but this one was really good! It was moist with a light hint of cinnamon and bits of carrot. The cream inside and the frosting was this wonderful salted caramel lime creme and I was surprised because it had that pitch of sourness that just made the cupcake taste so good.

Next was the Devil Cake and this one was heavy and very chocolaty. Perfect for a chocolate lover and for those who can't handle too much may want to pass on this. The frosting is dusted with this sparkling sugar and it looked almost too good to eat! The middle was this luscious creamy chocolate fudge.

Lemon, Lemon, Lemon cupcake was a bit hard in contrast to the cupcakes above and had this rather plain taste but the lemon inside was pleasantly tart and definitely loads of lemon. The frosting had this hint of lemon too.

I didn't get to try The Velvet though my roomie raved about it. I was at cupcake overload. I think the people looking at us got hungry because all of a sudden they wanted to go eat dessert lolol. So if you're in the area go stop by and see it for yourself.

BTW etsy also sells awesome bake goods. I haven't tried it myself but I've heard rave reviews. Stop by www.etsy.com and search for cakes, candies, cupcakes, maple syrup almost anything you can think of.

Happy Birthday!!
Sweet Cupcakes to all!!

Btw I created a new section to the left on any "How to" instructions

Saturday, November 8, 2008

How to make a puffy Origami Crane

Phew welcome to my little One Wish Crane collection number 6 out of 1000. Just 994 more to go! Since I've always been meaning to write a how-to on origami today's a great day as any! I've been making origami since I was little but it was not anything fancy just cranes, boxes, boats and airplanes. Recently I've wanted to try other things. There are many great origami how-to videos and sites here on the Internet just Google away. This is my how-to on making a puffy body crane the same as the crane used in the decoration above. Before we get to that... Origami is an ancient art of paper folding and there are many types of origami paper with hundreds if not thousands of different designs. Personally the thinner origami paper which are sold at any craft stores are much easier to fold then the thicker ones. You use any type of paper to fold origami... loose leaf, construction paper... etc. Well let's get started:

First step is to get a square origami paper and turn it on the side with no design.
Fold it in half across. Make sure every crease is crisp and straight. That is key to folding a neat origami anything.


It ends up looking like this

Open it and fold it half way on the other side.


Open it to the non design side and it should have the straight creases above.


Now fold it diagonally and it forms a triangle.


Fold the triangle across to make a smaller triangle.


Now carefully open one side of the triangle like above and fold it down making a diamond shape.

Do the same to the other side.


Now take the upper part of the diamond and fold it against the middle line like above.


Do it to all four sides until it becomes the kite shape above.


Open the "kite" and just fold in the flap. It should easily fold in, no problem.

Do the same for all the sides and you end up with the shape above.


Open the flap up like above.


Now take the point of the sides and fold it straight against the middle like above.


Do it for all sides and it should look like the picture above.


Now fold the wider flaps down so two flaps point down and two flaps are up.


Open to the thicker and longer of the flaps.


Fold it in so the thicker flap is folded in half.


Now gently pull out the thicker flap on both ends. One end will be the head and the other end is the tail.


Now choose one end and just nudge it down the middle to form the head.


Take the other two flaps and gently pull them down. The middle section should puff up as you pull the wings. If not just gently push the center and it'll puff right up.

Ta-da! Your very own puffy crane! I like it better then the ones that are flat without the puffiness in the middle. Hopefully my explanations and pictures are clear. They're perfect to do with kids and you can decorate them and what not. You can also string them up like what I did when I was young across a room. It's great decoration and you can add sparkles and glitter so they shine in the light. Also as I mentioned in one of my posts before that folding 1000 cranes would grant you a wish.

Happy folding!! =D